How To Make Spotify Louder And Sound Better
These are settings in Spotify such as boosting bass or treble, selecting audio settings for different types of music, and changing the overall volume level. This article on how to make Spotify louder is written for those using the Spotify app on iOS. You’ll need Spotify Premium to change these settings.
How to Make Spotify Louder#
Once you open Spotify, find the gear symbol in the top right corner, which is where you’ll find your settings. If you scroll down, you’ll see a section labeled Volume. There are three settings: Loud, Normal, or Quiet. Spotify sets the default volume level to Normal. You can set it to Loud. You may notice that besides the loud option it says “might reduce dynamics.” Dynamics refers to the changes between loud and soft in the music. Adjusting the volume to Loud reduces the dynamics. However, there isn’t a huge difference in sound quality and, to the untrained ear, the music will simply sound louder than it is when set to Normal. Another setting you’ll want to look at is Audio Normalization. This is a feature Spotify has in order to set the volume of all songs the same, so that songs that are louder or softer don’t sound out of place. If you turn this off, you won’t be able to change the Volume level. Songs will play true to the original mix.
How to Make Your Music Sound Better#
In your Spotify Playback settings, you’ll also find an option called Equalizer. Tap this to view the Equalizer bar. The Equalizer adjusts the audio frequency settings for different types of music. You can set it manually by tapping and dragging on the white dots to alter the audio at that frequency. Or, you can choose from among multiple presets. These include Bass Booster, Electronic, Hip-Hop, Rock, Pop, and more. You can change these settings while playing a song so that you can hear the differences among the different settings..
Other Spotify Settings for Better Playback#
There are more options you can change within the playback settings to enhance the audio and make Spotify louder.
Crossfade#
This is the rate at which the songs you’re playing fade into each other when one ends and another begins. You can use the slider to change this from 0 seconds to up to 12 seconds. You can also turn Gapless Playback on or off, which means there won’t be a gap of silence between songs being played and one will start immediately after another. You can turn on Automix, which changes the transitions between songs if a certain playlist uses it.
Play Feedback Sounds#
If there are any feedback sounds in a song, turning this on keeps them in the song. Whether it’s better to keep it on or off just depends on what kind of music you’re listening to and how you want to hear it.
Music Quality#
You can find the Music Quality settings on the main Spotify settings page under Playback. Here you can change the general quality of your music playback when it is either streamed or downloaded. For both streaming and downloaded music, you can choose from Automatic, Low, Normal, High, or Very High. Low quality is at 24 kbit/s, Normal is 96 kbit/s, High is 160 kbit/s, and Very High is at 320 kbit/s. The higher quality setting you choose, the more data or bandwidth you’ll use g. Depending on the type of playback device you use, such as headphones or speakers, you may not notice much difference. If you have high quality devices such as high end speakers, taking advantage of this feature may certainly make a difference in making Spotify louder and sounding better.
How to Use the Best Spotify Equalizer Settings for Improved Listening
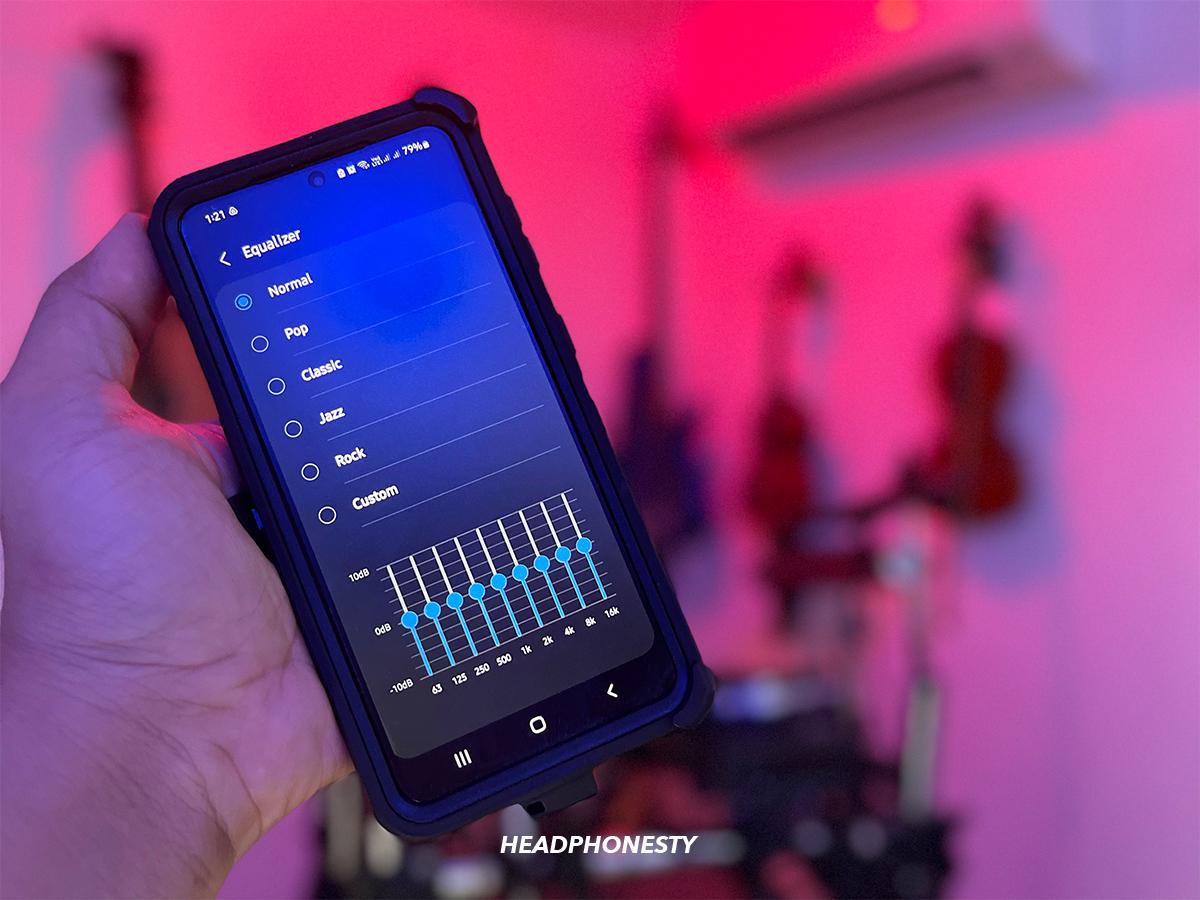
Maximize Spotify’s equalizer to make your favorite music even more enjoyable with this guide.
Spotify offers a built-in equalizer (EQ) to tailor your listening experience, similar to top streaming platforms like Apple Music and Tidal.
However, the equalizer isn’t a one-size-fits-all solution, and its effect can yield varied results based on your audio gear and personal preference.
Luckily, understanding what Spotify’s equalizer presets do and learning about other audio improvement tips can help you optimize sound quality. We’ll discuss all this and more, so keep reading until the end!
In This Article
How to Access the Spotify Equalizer
Accessing Spotify’s equalizer varies depending on your device. Here’s how to find it on iOS, Android, and desktop apps:
On iOS
- Open Spotify and select Settings > Playback > Equalizer.
- Tap the toggle to enable Equalizer and choose from the available presets or adjust the frequencies manually using iOS’ six-band EQ that ranges from 16 Hz to 15 kHz.
On Android
- Open Spotify, click on the profile icon and select Settings and privacy.
- Scroll down to Audio Quality, then tap Equalizer.
- Select Equaliser again under Sound quality and effects to view the presets or adjust the equalizer manually using the nine sliders that ranges from 63 Hz to 16 kHz.
On PC and Mac
- Open Spotify and click your profile icon in the upper right corner.
- Click Settings and scroll down to Playback.
- Toggle Equalizer on to enable the feature and select a preset or adjust the sliders.
How to Choose the Best Spotify Equalizer Settings
Spotify Equalizer Presets on Android and iOS
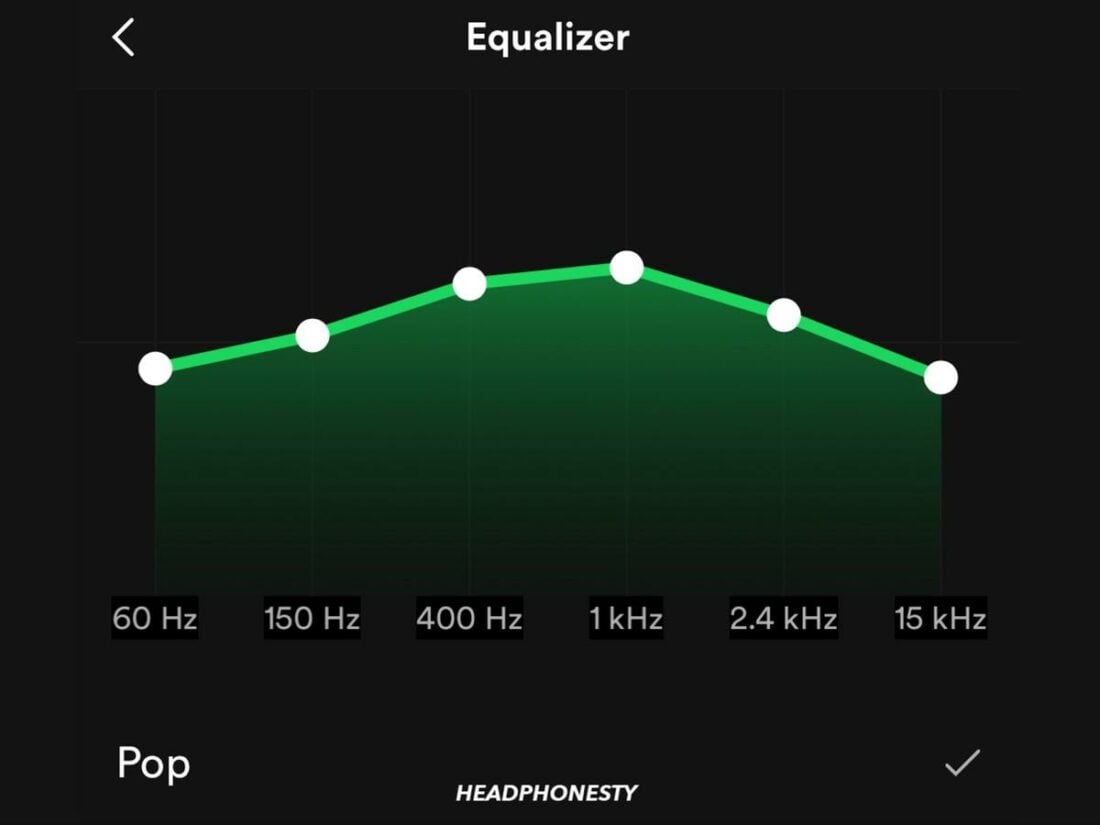
Spotify has five shared presets on the Android and iOS apps. Here’s what each sounds like:
| Preset | iOS | Android |
|---|---|---|
| Flat (iOS)/Normal (Android) | No frequencies are enhanced or reduced with this preset. | Same with iOS. |
| Pop | This preset boosts mids, reduces lows and highs, and highlights vocals. | It also boosts mids but has a flatter bass and more reduced highs than the iOS preset. |
| Classical | Somewhat V-shaped, with slightly increased highs and lows, but recessed mids. | Slightly more emphasis on low mids and highs. |
| Jazz | This profile boosts bass and treble while softening vocals by lowering the mids. | Significantly increases the lower mids and reduces the upper mids compared to the iOS preset. |
| Rock | Essentially the same as the Classical preset. | The reduction of the mids is more extreme than the iOS preset. |
Aside from the shared presets, Spotify provides additional equalizer options exclusively for iOS devices. These include the following:
- Bass Booster & Reducer: The former boosts the bass, while the latter lowers it.
- Treble Booster & Reducer: These adjust high-frequency sounds, making voices clearer in music and podcasts.
- Acoustic: Mostly sounds balanced across all frequencies, ensuring a natural sound.
- Dance: Increases bass and softens treble, which can affect vocals and strings.
- Deep: Similar to the Dance preset but with less treble and a stronger bass.
- Electronic: Emphasizes the highs, making songs sound brighter.
- Hip-Hop: Amps up the sub-bass and bass for beat-focused songs.
- Latin: Brightness is at maximum, making the higher end notably louder.
- Loudness: Mainly boosts the mids and lower end.
- Lounge: Enhances midrange frequencies – ideal for chill, vocal-rich tracks.
- Piano: Strengthens the piano’s presence and clarifies other sounds in the same frequency range.
- R&B: Similar to Hip-Hop but with more treble, ideal for tracks with solid bass and female vocals.
- Vocal Booster & Spoken Word: Increases midrange frequencies while dampening highs and lows for improved speech intelligibility.
- Small Speakers: Enhances sound quality on smaller, substandard speakers by lowering the highs and increasing the bass.
Other Audio Improvement Tips to Make Spotify Sound Better
Spotify’s equalizer is great at fine-tuning your audio, but you can further improve your listening experience in other ways. Here are a few:
- Turn onAudio Normalization: Songs vary in loudness due to how they’re mixed, making them sound uneven at the same volume. By normalizing, volume is made uniform. To activate this feature on Spotify, go to Settings > Playback and turn on Normalize volume.
- Enable Hardware Acceleration: This feature boosts Spotify’s efficiency by using your computer’s hardware for smoother playback, faster song loading, and better audio processing. Available only on the Spotify desktop app, you can enable it under Settings > Compatibility > Enable hardware acceleration.
- Change Change Streaming Quality: This lets you adjust your audio quality to prioritize data savings or sound quality. Spotify typically defaults to Automatic and adjusts based on your connection speed. For better sound, select the High or Very High streaming setting by going to Settings > Audio quality > Streaming quality.
- Transition effects: You can access this navigating to Settings > Playback > Crossfade, Gapless, or Automix. Crossfade blends the song with the next using a fade effect, Gapless eliminates gaps between songs, and Automix uses AI to switch tracks seamlessly through crossfading, skipping intros, or looping sections.
- Consider upgrading your setup: Headphones need sufficient power to function well. Without it, you’ll face audio quality issues, even with EQ changes. Use an external amp to boost volume and a digital-to-analog converter for better audio processing. You can also try our headphone power calculator to check their power requirements.
FAQs on the Best Spotify Equalizer Settings
What does the Spotify equalizer do?
The Spotify equalizer allows you to boost, lower, or maintain specific sound frequencies. This alters the sound signature of your music, allowing you to customize your listening experience.
Which Spotify equalizer setting is the best?
There’s no “best” equalizer setting due to two key factors:
- User preference: Equalizer settings are highly subjective. Some prefer the original mix, while others enjoy boosting frequencies. It’s about what sounds good to you.
- Audio device: Speakers and headphones have different sound profiles and frequency limits that affect audio output.
Why does my Spotify audio quality sound bad?
If poor audio persists after EQ tweaks, it could be due to the following reasons:
- Your audio gear can’t accurately reproduce music due to limited frequency range and power.
- Your streaming quality is set to Low or Automatic.
- You downloaded music in Low or Normal quality for offline listening.
Why is the Spotify equalizer unavailable when streaming to a stereo system?
The Spotify equalizer works only on the device running Spotify and processing the audio. When using an external speaker via Spotify Connect, music streams from Spotify’s servers, not your phone. Thus, your phone’s EQ settings won’t apply, nor can you adjust them. Instead, use your speaker’s built-in equalizer, if available.
How to Get the Effective Sound Quality in Spotify

Spotify is an online music streaming application that provides a wide range of music, podcasts, etc. It offers you its content in two ways, free and a Spotify Premium version. Premium is the monthly subscription account with a whole lot of features, one of which is upgraded sound quality.
Below is the complete guide on how to improve the sound quality of your Spotify.
Upgrading Spotify Sound Quality
Despite Spotify’s default audio quality, you can upgrade the same manually. But keep in mind; that not only does it depend on the settings, but the audio devices you’re using.
The steps to improve the sound quality of Spotify on Windows and Mac are:
1. Click on ‘Spotify’ on top of the screen and click ‘Preferences’ on your Mac.
Open the Spotify application in the windows and click on the menu button, which is a three-dotted icon. Select ‘Edit’ from the next set of options. A pop-up menu will appear, select ‘Preferences.’
· A drop-down menu will appear. Select ‘Streaming Quality’ from the options on both Windows and Mac.
· Select the quality of the audio according to your convenience.
The steps to improve the sound quality of Spotify on Android/iOS are:
1. For Android/iOS devices, click on the ‘Settings’ button on the ‘Home’ tab in Spotify, and go to ‘Preferences.’
2. A window with a set of options will appear on the screen. Select ‘Music Quality.’
3. The next pop-up window contains the quality options for the audio. Select as per your choice.
You can test the audio quality and then apply it, or click on the ‘Automatic’ option to set the quality by default.
How to Pair and Impair Spotify Volume Normalization
Spotify uses Volume Normalization to keep the song’s impact at its original level, but you can change these settings manually. To do the same, follow the steps below.
The steps to change Volume Normalization settings of Spotify on Windows and Mac are:
1. Click on ‘Spotify’ on top of the screen and then click ‘Preferences’ on your Mac.
Open the Spotify application in the windows and click on the menu button, which is a three-dotted icon. Select ‘Edit’ from the next set of options. A pop-up menu will appear, select ‘Preferences.’
· Under the ‘Music Quality’ option, Turn the slider on for ‘Audio Normalization.’
The steps to change Volume Normalization settings of Spotify on Android/iOS are:
1. For Android/iOS devices, click on the ‘Settings’ button on the ‘Home’ tab in Spotify, and go to ‘Preferences.’
2. Go to the ‘Playback’ option and turn the slider on for ‘Enable Audio Normalization.’
You can also change the volume level from the setting, divided into three categories: Quiet, Normal, and Loud.
As you select these settings, it’ll be applied automatically to your Spotify audio.
Working with Spotify Equalizer on Android, iPhone, and iPad
A Music Equalizer enables you to set the volume of the audio. An Equalizer offers you to change the quality according to the environment- for example; an echo sounds great in a peaceful spot.
Android, iPhone, and iPad have in-built settings for the same, while third-party applications need to be installed for working with Windows and Mac.
The steps to use Spotify Equalizer on Android, iPhone and iPad are:
1. Go to the ‘Settings’ menu from the ‘Home’ tab in Spotify.
2. For Android, click on the ‘Music Quality’ option and then go to ‘Equalizer’ menu.
For iPhone and iPad, click on the ‘Playback’ option and then tap on the ‘Equalizer.’
· Next, you can variate the frequencies in audio and change the settings accordingly.
You can also disable the settings of the ‘Equalizer’ by turning the slider off for the same.